
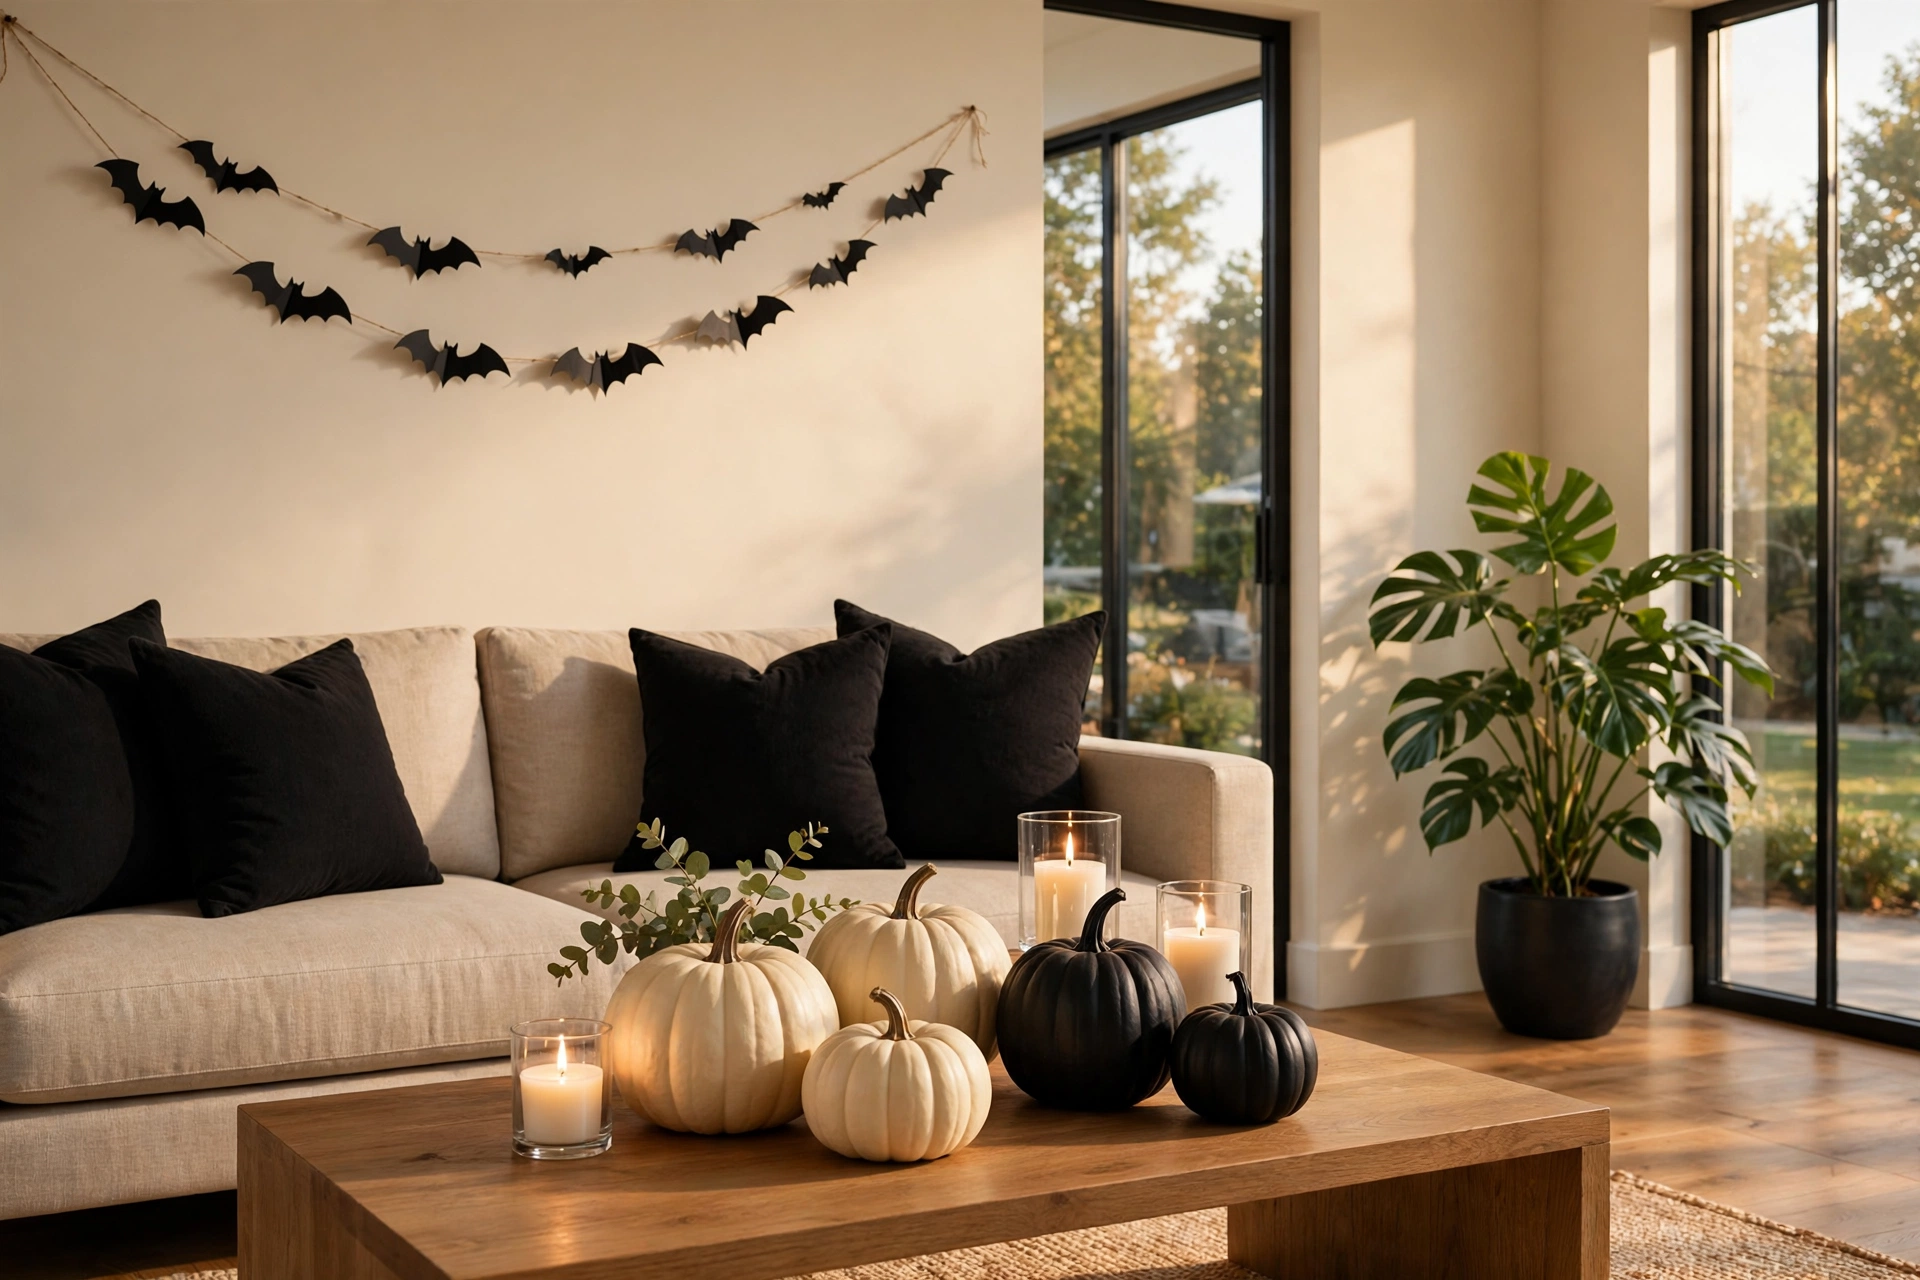
25 Halloween Room Decor Ideas for a Festive Home
The first Halloween in our house, my first try at halloween room decor went too far in one room and not far enough in all the others. I bought a bag of plastic spiders, a box of fake cobwebs, and one of those skeletons that hangs from a door, and I put almost all of it in the living room on the same Saturday afternoon. The sofa looked like a crime scene. The hallway looked like nothing had happened. My wife came home, stood in the doorway, and said the nicest possible version of the truth, which was that the room looked busy and the house did not look like Halloween at all.
That night I took most of it down, kept three things, and moved one small pumpkin to the hallway table. The whole house changed. It taught me the lesson that runs through every idea in this post. Good halloween room decor is not about how much you buy. It is about putting the right thing in the right spot, in every room you actually live in, and leaving the rest alone.
The 25 ideas below are organized the way I decorate now, room by room and zone by zone, so you can do one room in an afternoon or the whole house over a weekend. Pick the rooms you use most and start there.
The Room Walk and the 3-3-3 Rule
Before you buy anything, walk your house the way a guest would. I call this the Room Walk, and it is the first framework in this post. Stand in the front doorway and look in. That is Stop 1, the first glance. Then sit where you usually sit, on the sofa or at the kitchen table, and look around at eye level. That is Stop 2, the seat. Then walk to the far corner of the room, turn around, and look back. That is Stop 3, the corner view. If a room looks good from all three stops, it is done. If it only looks good from the sofa, you have decorated a photo, not a room.
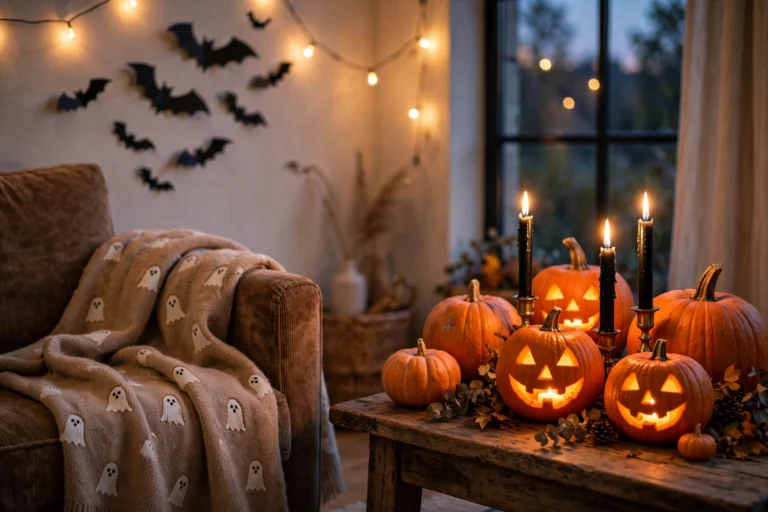
The second framework is the 3-3-3 Rule, and I use it in every room. Three colors, three light sources, and three textures. For Halloween, my three colors are usually black, cream, and one warm color, like burnt orange or deep plum. My three light sources are the room light turned low, one table lamp or string of fairy lights, and one candle glow, real or battery powered. My three textures are something soft, like a knit throw, something hard, like a ceramic pumpkin, and something natural, like dried branches or a woven basket. When a room feels off, IMO, it is almost always because one of the threes is missing. Add the missing one and the room settles.
The zones below follow the Room Walk, from where you sit to the walls, the surfaces, the softer rooms, and the modern and budget rooms. FYI, every idea works in a rented home too, with removable hooks and putty instead of nails.
Halloween Room Decor for the Sofa, Seating, and Center of the Room
1. Start With the Sofa, Not the Walls
Most people start Halloween decorating on the walls, and that is why so many rooms look scattered. Start with the sofa instead, because the sofa is the biggest thing in the room and it sets the color story for everything else. Swap two everyday pillows for black ones, keep one cream pillow in the middle, and drape a chunky knit throw in burnt orange or black and cream plaid over one arm. That is the whole first move, and it takes five minutes.
Once the sofa is set, the rest of the room has a palette to follow. The black pillows tell you the bats should be black, not purple. The cream pillow tells you the pumpkins should be cream and white, not neon orange. The throw tells you the room should feel warm, not just spooky. If you want more ideas for this exact spot, these Halloween living room ideas build on the same sofa first approach, with more ways to style the coffee table and the mantel around it.
2. Build One Coffee Table Tray and Stop There
A coffee table is a small stage, and a tray is the edge of the stage. Put a dark wood or black metal tray in the center of the table and build one small display inside it: a cream pumpkin, a black candle in a glass holder, a stack of two books with spooky covers, and one small fun piece, like a ceramic bat or a tiny skull. Four things, grouped close, on one tray.
The tray does two jobs that matter more than how it looks. First, it keeps the display together, so the pumpkin does not wander to one end of the table and the candle does not end up beside the remote. Second, it makes cleanup instant. If you decorate the whole table surface instead, you will spend the month moving things around every time someone sits down. One tray, four things, done.
3. Layer a Throw and a Blanket Like You Mean It
Halloween rooms fail when they are all hard surfaces and sharp edges. Pumpkins are hard. Candles are hard. Bats are flat. A room full of hard things feels like a shop display, not a place to sit. The fix is textile, and lots of it. Layer a knit throw over the sofa arm, fold a second blanket over the back of the reading chair, and put a soft rug or a woven basket with extra blankets beside the sofa.
Choose textiles you would use all fall, not novelty blankets with a giant ghost face that you will fold away on November 1. A burnt orange knit, a black and cream plaid, or a deep plum velvet cushion cover will all earn their keep through Thanksgiving. The Halloween feeling comes from the color and the layering, not from a printed slogan. They are thinking the room feels good.
4. Give the Reading Chair Its Own Small Moment
Every living room has a chair that gets ignored while the sofa gets all the attention. Give that chair one small Halloween moment of its own. A single black pillow, a small pumpkin on the side table, and a candle or a small lamp that casts warm light on the chair in the evening. That is it. One chair, three things.
This works because the Room Walk has a corner view, Stop 3, and the reading chair usually sits in that corner. When you turn around from the far end of the room, the chair is what you see. If the chair is bare, the corner looks unfinished, even if the sofa looks perfect. If the chair has its own small moment, the whole room feels decorated, because every stop on the walk has something to look at.
5. Anchor the Seating Area With a Rug Swap
If your room has a rug, the rug is the floor of the whole Halloween look, and swapping it is the fastest way to change the room without buying decor. You do not need a Halloween rug. You need a rug in the right colors: a warm neutral with a black border, a vintage style rug in rust and cream, or a simple jute rug layered under a smaller patterned rug. The rug grounds the sofa, the coffee table, and the tray, and it tells your eye where the room starts and ends.
In a small room, a rug swap does even more work, because there is less floor to cover and the rug fills more of what you see. Keep the rug flat and low pile near the seating area, so the coffee table sits steady and the tray does not wobble.

Walls, Windows, and Doors
6. Hang One Bat Swarm and Leave the Rest of the Wall Alone
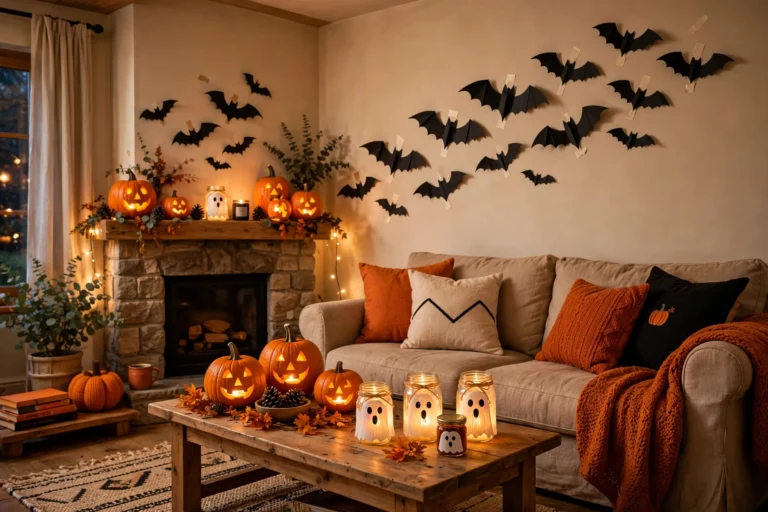
Paper bats are the cheapest Halloween decor that actually looks good, and they are also the easiest to overdo. One swarm, on one wall, in a rising pattern, is the move. Cut bats in three sizes from black cardstock, fold the wings slightly so they catch the light, and stick them to the wall with removable putty. Start low near a corner and let the bats rise and spread, like they are flying up toward the ceiling.
The mistake is putting bats on every wall. One swarm has a story. Bats on four walls look like you could not decide. Pick the wall you see first when you walk in, or the wall behind the sofa, and keep the other walls bare. A bat that falls at 2 a.m. is funny once and annoying every night after.
7. Swap One Piece of Art for a Seasonal Print
Take down one framed print, just one, and replace it with a Halloween print for the month. A vintage witch illustration, a haunted house scene, a simple moon and bats print, or a funny ghost quote all work. Print it at home or at a copy shop, pop it into the frame you already own, and hang it in the same spot. The frame stays. The nail stays. Only the picture changes.
This idea works because it uses the room you already have. The print sits at the same height as the art it replaced, so it looks like it belongs, and it does not add clutter to a surface. It is also the easiest idea in this post to undo. On November 1, the old print goes back in the frame and the Halloween print goes in a folder for next year. One small seasonal print in a gallery wall reads as a wink. One giant Halloween print in the middle of a gallery wall reads as a takeover.
8. Turn the Window Into Halloween Art After Dark
A window silhouette is the one decoration that works twice: once in the daytime, when you see the shape against the light, and once at night, when the room light makes it glow for anyone outside. Cut a black cat, a witch on a broom, or a haunted house shape from black poster board and tape it to the inside of a front facing window. Keep the shape simple and bold, because fine detail disappears against glass at night.
If you have kids, let them pick the shape and help tape it up. And when the lights go on at dusk, the window does the Halloween work for the whole street, which is a lot of return for one sheet of poster board.
9. Dress the Doorway Like an Entry, Not a Border
Doorways tempt people to hang a garland across the top and call it done. A garland across the top is fine, but a doorway dressed like an entry is better. Hang the garland a little lower on one side, so it drapes instead of sitting flat. Put a small pumpkin on the floor on one side of the doorway, not both sides. Add one wall decoration, like a small wreath or a framed print, on the wall beside the door. The doorway now has a beginning, a middle, and an end, instead of a single line across the top.
If your Halloween decorating starts at the front door, carry the same colors and the same pumpkin style through the first doorway inside, so the house feels connected. For the front entry itself, this Halloween entryway decor post has entry specific ideas that pair well with the indoor doorway styling here, using the same black, cream, and warm orange palette.
10. Use a Garland as a Bridge, Not a Border
A garland should connect two things, not just sit on one thing. Drape a felt ball garland, a paper ghost garland, or a strand of faux fall leaves from the top of a mirror to the top of a bookshelf, across a doorway, or along the mantel to the wall beside it. When a garland bridges two pieces of furniture, it pulls the room together and makes separate pieces feel like one display.
Keep the garland loose, with a gentle dip in the middle, and let the ends hang a few inches lower than the center. A garland pulled tight looks like a clothesline. A garland with slack looks like decorating. If the garland is heavy, use small removable hooks at both ends and one in the middle, and check the middle hook after a day, because heavy garlands creep downward overnight. One garland per room is enough.
Tables, Shelves, and Small Surfaces
11. Style the Bookshelf in Threes
Open shelves are where Halloween decorating goes wrong fastest, because every small thing you own ends up on a shelf at once. Use the rule of three on each shelf: one stack of books, one pumpkin, and one candle or one small figure. That is the whole shelf. Move to the next shelf and do it again, with a different combination, so the shelves rhyme instead of repeating.
Keep the fragile pieces up high and the soft pieces down low if you have kids or pets in the house. A ceramic skull on the bottom shelf is a skull that will be carried around the house. A fabric pumpkin on the bottom shelf is a toy, and that is fine. Leave one shelf mostly empty, or with a single plant and nothing else. An empty shelf is not a failure. It is the breathing room that makes the decorated shelves stand out.
12. Make the Mantel the Room’s One Big Statement
If your room has a mantel or a fireplace, it is the natural centerpiece, and it deserves one big statement instead of ten small ones. Start with a garland across the top, add two tall candles or two tall candlesticks at the ends, and put one hero piece in the center, like a large wreath, a framed print, or a cluster of three pumpkins in different sizes. Then add two or three small pieces at the base, and stop.
The mantel is also the place where the safety rules matter most, because candles and dried garlands sit close together. Use battery candles on the mantel if the garland is dried leaves or paper, and keep real flames in glass holders, well away from anything that can catch. If it reads clearly from the doorway, it is done. If you have to stand close to see it, it is too fussy.
13. Turn a Side Table Into a Candle Station
A side table is too small for a full display and perfect for a candle station. Group three candles of different heights on a small tray or a single plate: one tall pillar, one medium jar candle, and one small tea light in a glass holder. Add one small pumpkin or one sprig of dried eucalyptus beside the tray, and nothing else. The height difference is what makes it look styled. Three candles at the same height look like a row. Three candles at three heights look like a display.
Use flameless LED candles here if the side table sits beside a chair where someone will reach for a book or a cup. A real flame beside an elbow is a spill waiting to happen, and a battery candle with a warm glow gives you the same light without the worry. Set the candles on a timer if they have one, so they come on at dusk and go off at bedtime without you thinking about it.
14. Style the Console Table With Height, Not Stuff
A console table against a wall is a styling trap, because it is long and empty and it invites you to fill every inch. Resist that. Style it with height instead of stuff: one tall vase with dried branches, one medium stack of books with a small pumpkin on top, and one low candle or one small bowl. Three heights, three things, lots of empty space between them. The empty space is what makes the tall vase look tall.
Keep the console table against the wall it belongs to, and do not let it creep into the walkway. A console table that sticks out into the Room Walk path will get bumped, and a bumped console table is how pumpkins roll onto the floor. If the table is narrow, use the wall above it for the decoration instead: one framed print or one small bat swarm, and keep the table surface almost bare.
15. Put a Bowl of Candy Where Guests Actually Sit
A candy bowl is practical decor, and practical decor is the best kind, because it gets used. Use a dark bowl or a cauldron shaped container, fill it with wrapped candy in orange, black, and purple wrappers, and put it where guests actually sit, on the coffee table or on the side table beside the sofa, not on a shelf nobody reaches. Add one small detail to make it feel intentional: a small handwritten card that says take one, or two, propped against the bowl. That is the whole styling. The candy does the color work, the bowl does the shape work, and the card does the personality work. Keep the bowl away from direct sun, because chocolate and warm windows do not mix, and keep it out of reach of dogs.
Cute Corners, Kids, and Bedrooms
16. Keep the Cute Corner Friendly, Not Scary
Not every room wants to be spooky. The cute corner is the room, or the corner of a room, where Halloween is friendly: smiling pumpkins, soft ghosts, pastel orange and cream, and garlands with round shapes instead of sharp ones. Pick one corner, usually the corner a child sees first, and keep the cute things together there. A small ghost figure on the shelf, a smiling pumpkin on the floor, and a soft garland on the wall. The cute corner tells kids this holiday is for them, and it tells adults the house has a sense of humor.
The trick is containment. Cute decor spread through the whole house dilutes the grown up rooms. Cute decor in one corner makes that corner feel special. If you have a playroom or a family room, the cute corner can be the whole room. If you have one living room, make it one corner, and let the rest of the room stay a little more elegant.
17. Let Kids Decorate One Shelf, Their Way
Give each child one shelf, one windowsill, or one small table, and let them decorate it their way, with no fixing after. Their pumpkins might face the wrong way. Their bats might be upside down. Their ghost might be wearing a sticker. That is the point. A shelf a child decorated is a shelf a child will look at every day, and a shelf you fixed is a shelf that teaches them their taste is wrong.
Set two safety rules and leave the rest alone. Rule one: nothing with a real flame on the kid shelf, battery candles only. Rule two: nothing small enough to be a choking hazard if there is a toddler in the house, and nothing heavy on a high shelf. Everything else is fair game. FYI, the kid shelf is also the shelf guests compliment most, every single time.
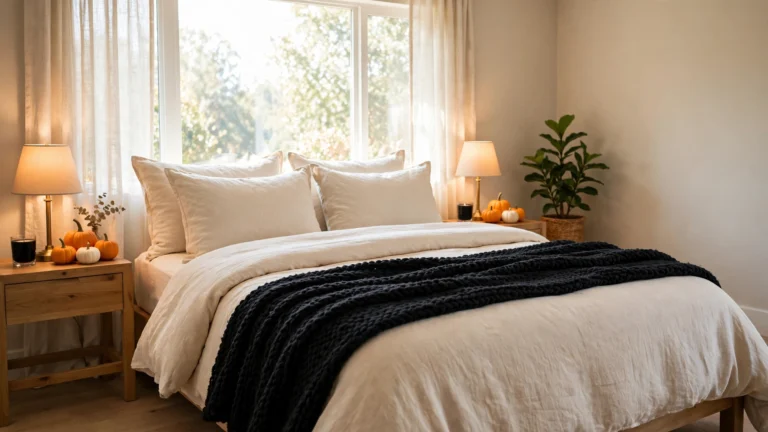
18. Style a Bedroom Corner Without Waking Up to a Haunted House
A bedroom needs Halloween decor that feels seasonal in the evening and calm in the morning, because you have to sleep there. The answer is a bedroom corner, not a bedroom takeover. Style the nightstand with one small pumpkin and one candle, swap one pillow cover for a black or burnt orange one, and hang one small garland above the headboard or on the wall beside the bed. The bed itself stays calm. The corner does the Halloween work.
Keep bedroom Halloween soft, warm, and a little bit funny, and keep the lights warm and low. If you want a full bedroom version of this idea, with more bedding and nightstand styling, these Halloween bedroom ideas cover the bedroom as its own room, while this post treats the bedroom as one zone in the whole house.

19. Use Soft Ghosts and Fabric Pumpkins at Kid Height
At kid height, everything should be soft. Fabric pumpkins, plush ghosts, felt garlands, and soft throw pillows are the right materials below waist height, because kids touch everything, and so do dogs. A fabric pumpkin that gets squeezed is still a pumpkin. A ceramic pumpkin that gets squeezed is a cleanup. Put the soft things where small hands reach, and put the ceramic and glass things where small hands do not.
A glass candle on the floor is a hazard, and it should never be on the floor. If you want floor decor, use pumpkins, baskets, and soft figures, and keep the floor clear of cords, candles, and anything that tips. A room that is safe at kid height is a room you can actually relax in, and relaxing is the whole point of decorating in the first place.
20. Add a Reading Nook With a Spooky Book Stack
If any room has a reading chair, a window seat, or a corner with a lamp, give it a spooky book stack. Three or four books with Halloween or ghost story covers, stacked on the side table, with a small pumpkin on top and a throw draped over the chair. A warm lamp nearby makes the corner inviting for an evening of reading, and the book stack tells the story of the season without a single plastic spider.
This idea costs nothing if you already own the books, and it makes the room feel lived in instead of staged. If the reading nook is in a bedroom, keep the books gentle, ghost stories and cozy mysteries, not horror. If it is in the living room, the scarier covers can come out. The nook is a small room inside the room, and it follows the same 3-3-3 Rule: one warm light, one soft textile, and one dark accent, repeated at a smaller scale.
Modern and Budget Halloween Room Decor
21. Go Modern With Black, Cream, and One Sculptural Piece
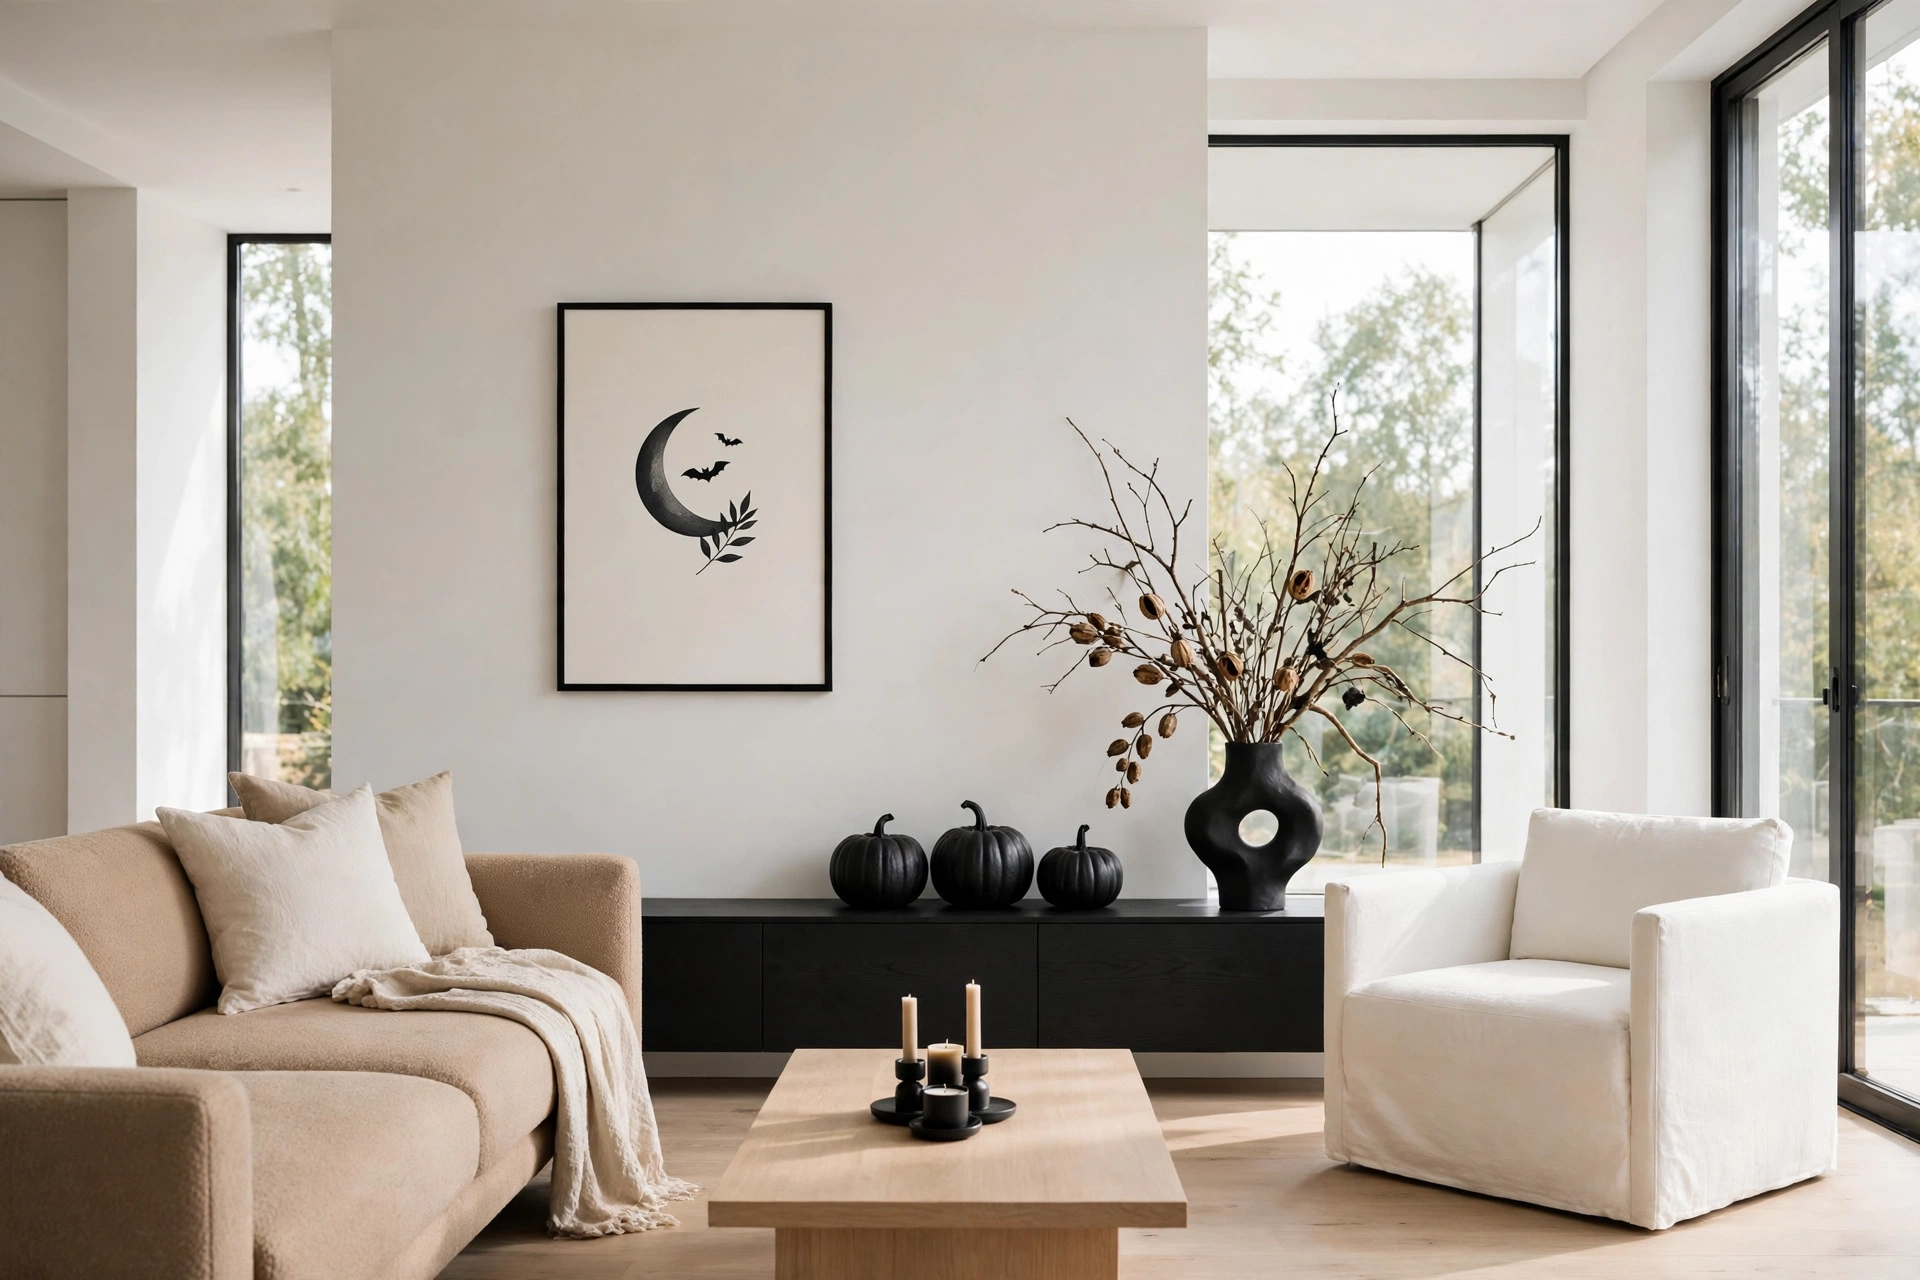
Modern Halloween room decor is about restraint. Black, cream, and white, plus one sculptural piece, and nothing else competing for attention. A matte black vase with dried branches on a low console. Three matte black pumpkins in a row, different sizes, on a black sideboard. One framed print with a simple moon and bats, hung alone on a white wall. The room stays calm, and the Halloween pieces read as design, not decoration.
The modern rule is one hero per surface and one hero per wall. If the console has the black vase, the wall above it stays bare. If the wall has the framed print, the console below it holds one candle and nothing else. Modern rooms fail when they try to be both modern and maximalist in the same corner. If your house is traditional, use this zone for one room, usually the room with the cleanest lines, and let the other rooms be cozier.
22. Use the 50 Dollar Room: Pumpkins, Paper, and Light
You do not need a big budget to make a room feel festive. The 50 dollar room uses three things you can buy in one trip: pumpkins, paper, and light. Small real or foam pumpkins in cream and orange, five to seven dollars each, grouped in threes on the coffee table and the mantel. Paper bats and a paper garland, under ten dollars total, on one wall. One string of warm fairy lights, or one pack of battery tea lights, under fifteen dollars, tucked into jars and along a shelf. That is the room.
Put three on the coffee table tray and two on the mantel, and let the paper and the light do the rest. This DIY Halloween decorations on a budget approach, making paper bats and simple displays from materials you already own, is the same budget thinking, applied to the whole room instead of one project.
23. Reuse What You Own Before You Buy Anything New
Before you shop, walk the house with an empty basket and collect what you already own that fits the palette. Black books. Cream candles. A dark throw. A woven basket. A vase that could hold branches. Dried leaves from the yard, washed and dried. A white sheet that could become cheesecloth ghosts. Most houses already own half a Halloween room, hiding in cupboards and on bookshelves.
This is not just a budget tip. It is a style tip. Decor made from things you already own looks like your house, because it is your house. Decor bought all at once from one store looks like that store. The reused pieces also solve the storage problem, because they go back where they came from on November 1, and you only have to store the few new Halloween pieces you bought. I do this walk every year, and every year I find something I forgot I owned that becomes the best piece in the room. This year, who knows.
24. Style a Small Room With One Wall and One Surface
Small rooms do not need fewer ideas. They need the same ideas, edited harder. In a small room, decorate one wall and one surface, and leave everything else alone. One wall gets the bat swarm or the swapped print. One surface, usually the smallest table or the windowsill, gets a tray with a pumpkin and a candle. The sofa gets one black pillow. That is the whole room, and it will feel festive, because every stop on the Room Walk has one thing to look at and nothing is crowded.
The small room rules are stricter versions of the big room rules. No floor decor, because floor space is walking space. No garlands across the ceiling, because they lower the ceiling visually. No dark rug, because a dark rug makes a small floor look smaller. Use light colors on the walls and the big surfaces, dark colors only in small accents, and keep the light warm and bright. The Lights Off Test at the end of this post is stricter in a small room, and that is a gift, because it forces the editing that makes the room work.
25. Finish With Scent, Sound, and the Lights Off Test
The last idea is not a decoration. It is a feeling. Scent first: one candle or one wax melt in pumpkin spice, apple cider, or cinnamon, in one room only, so the house smells like October when you walk in, not like a candle shop. And then the check that ties the whole post together, the Lights Off Test.
The Lights Off Test is the second named check in this post, and it is how I finish every room. Wait until dusk. Turn off the overhead lights. Leave only the lamps, the fairy lights, and the candles on. Stand in the doorway and look in. Does the room glow in three places, like the 3-3-3 Rule says it should? Does the bat swarm read as bats, or as black smudges? Does the coffee table tray glow, or does it disappear? Fix the one thing the test finds, run it again, and then stop. A room that passes the Lights Off Test on an ordinary October evening is a room that is finished, even if it is not perfect.
Safety and Durability: Candles, Flames, Kids, and Pets
Halloween decor lives close to flames, fabric, and curious hands, so the safety rules are not optional extras. They are part of the styling. Use battery candles anywhere near paper, cheesecloth, dried leaves, or fabric garlands. Use real candles only in glass holders, on stable surfaces, away from the edge, and never leave them burning in an empty room. For kids and pets, the rules are simple and strict. Nothing small enough to swallow at toddler height. Nothing heavy on a high shelf above a play area. No chocolate at dog height, and no candy bowls on the floor. Keep cords from string lights tucked behind furniture, not across walkways, because a tripping cord in the dark is a fall, and a chewed cord is a vet or electrician visit. Durability matters too.
Budget: Buy Once vs Refresh Each Season
Buy once: the black pillow covers, the dark tray, the glass candle holders, the good battery candles with timers, and the ceramic or foam pumpkins in cream and black. These are the backbone, and the backbone should be bought once and kept for years. Refresh each season: the paper bats, the garland, the small real pumpkins, the scented candle, and one new small piece, like a print or a plush ghost. The refresh costs about 30 to 50 dollars a season, and it is what makes the house feel current without touching the backbone.
If your budget is 50 dollars for the whole house, do the 50 dollar room from Idea 22 in the room you use most, reuse what you own in the other rooms, and spend the rest on light. That 50 dollar version is the version I did first, and it is the version that convinced me the house was worth the rest.
Small Space Variations
In a studio apartment, decorate the one wall you see from the door and the one surface you sit beside, and let the rest stay calm. In a small living room, use the sofa swap and the coffee table tray, skip the floor decor, and keep the rug light. In a shared house, give each person one shelf or one corner, and keep the shared rooms to the 3-3-3 palette so the house does not become five different Halloweens. In a home with a toddler, move every idea up one level: the tray goes on a high shelf, the bats go high on the wall, and the floor gets fabric pumpkins only.
Troubleshooting Fixes
If the room feels cluttered, remove one thing from every surface and check the Room Walk again. Clutter is usually three displays competing, not one display that is too big. If the room feels dark and flat, check the light first. A cool white overhead bulb makes black decor look gray and cream decor look blue. Swap to a warm bulb, add one lamp, and the same decor will look different. If the bat swarm keeps falling, switch from putty to small Command strips, clean the wall with a dry cloth first, and press each strip for thirty seconds. A bat that falls once will fall again until the strip is right.
If the candles look lost on the table, group them closer together and put them on a tray or a plate. Candles spread across a table look like clutter. Candles grouped on a tray look like a station. A sagging garland is usually a garland with no middle support, not a garland that is too long. One scent is a signature. Three scents are a shop. Matte reads as real from across the room. Shiny reads as plastic from the doorway.
FAQs
How do I decorate a room for Halloween without it looking cluttered?
Choose three focal points in the room, such as the sofa, one wall, and one table. Decorate only those spots and leave the rest of the room alone.
What are cheap halloween room decor ideas that still look good?
Paper bats, a paper garland, and a bowl of candy cost under twenty dollars combined.
How can I make halloween room decor safe for kids and pets?
Use battery candles near paper, fabric, and dried leaves, keep real flames in glass holders on stable surfaces, and keep chocolate and small pieces out of reach. Put soft fabric pumpkins and plush ghosts at kid height, keep ceramic and glass pieces up high, tuck light cords behind furniture, and keep dried garlands away from heaters and radiators.
When should I put up halloween room decor?
Early to mid October is ideal. It gives you the full month to enjoy it and lines up with when guests expect to see seasonal decor.
How do I take down Halloween room decor quickly after October 31?
Store decorations by zone in labeled bins, one for the sofa and seating, one for the walls, and one for the tables and shelves. Trays and garlands come down in one lift each.


One Comment