35 Halloween Home Decor Ideas to Try This Year
The first Halloween in our house, my first try at halloween home decor went a little wild. It was a Saturday in early October, the weather had finally turned cool, and I came home from the store with two big bags of orange plastic, a blinking skeleton, and a fog machine I had no plan for. My husband looked at the pile on the kitchen counter and said, very gently, where is all of this going to live. By that night, every surface had something on it. The mantel was crowded, the coffee table was crowded, and the whole house looked less like a haunted home and more like the clearance aisle had moved in. The kids loved it for about a day. I hated it for the whole month.
That messy first year taught me the lesson behind every idea in this post. Halloween home decor works best when it follows the way people actually move through a house. Guests do not study every corner. They come in the front door, they notice the glow, and they settle where everyone gathers. I call that Door, Glow, Gather. Get the door right, get one warm glow right, get the gathering spot right, and the rest of the house can stay calm. IMO, most Halloween decorating fails are not about taste. They are about trying to decorate everywhere at once.
These 35 halloween home decor ideas are built around that path, zone by zone, from the porch to the bedroom. Some are elegant and quiet, some are easy DIY projects for a weekend afternoon, and some are made for small rooms where one good wall has to do all the work. I have tried all of them in real houses, including small apartments, homes with toddlers, and homes with a dog who believes every pumpkin is a toy. Pick the zones that match your house, use my Tall, Soft, Glow formula on every surface, and finish with the Candlelight Walk Test at the end. Your house will feel festive the minute someone walks in, and you will still be able to find the remote.
Halloween Home Decor That Starts at the Front Door
1. Layer Two Doormats for a Finished First Step
Start outside, because the door is the first idea your guests meet. Lay a larger black and cream patterned rug under a smaller Halloween doormat with a simple greeting or a row of bats. The layered look reads intentional, it catches dirt better than one thin mat, and it costs very little if you reuse a rug you already own. Keep the top mat flat and low so the door still swings freely, and shake both mats out once a week, because October leaves pile up fast.
2. Style the Entryway Console With Tall, Soft, Glow
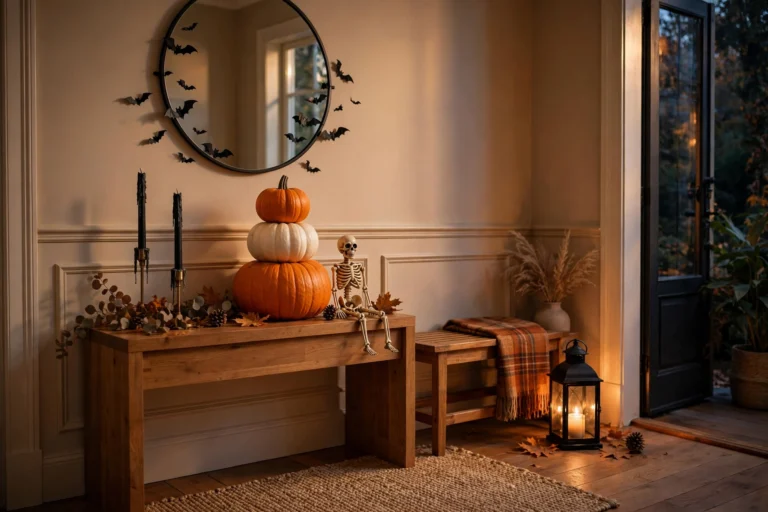
The entryway console is the elegant heart of this whole post, and it is where the Tall, Soft, Glow formula earns its keep. Tall means one tall element, dried branches in a vase or tall black candlesticks. Soft means one soft element, a small stack of cream pumpkins or a folded throw on a bench. Glow means one warm light, a candle in a glass holder or a small lamp. That is the whole console. If you want more detail, these halloween entryway decor ideas show the same console styled for a narrow foyer and for a wide open entry, but the formula does not change. Keep the middle of the console clear for keys and mail, because a beautiful console that blocks real life gets cleared off by day three.
3. Hang a Wreath With a Long Black Ribbon
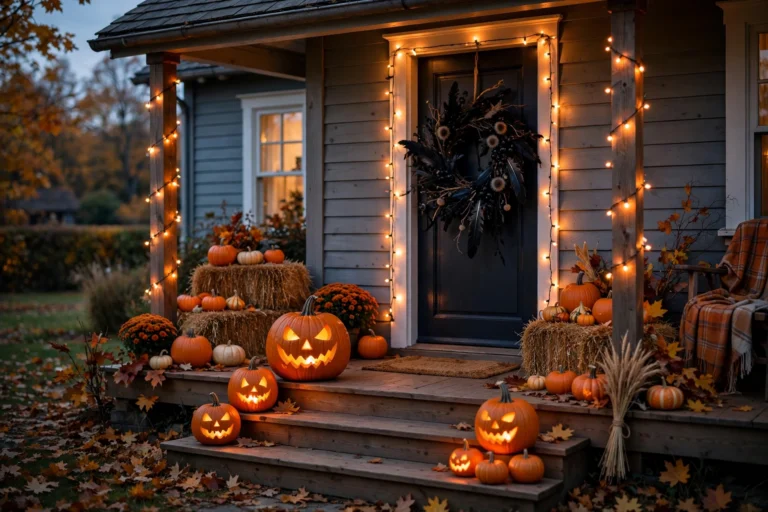
A wreath is the fastest way to say Halloween from the street, and a long black ribbon is what makes it look grown up. Choose a simple wreath of dried leaves, faux eucalyptus, or grapevine, add three small black pumpkins or a cluster of black berries, and hang it from a wide ribbon looped over the door. Let the ribbon tails hang down about twelve inches. FYI, if your door gets direct sun, skip real dried leaves, which fade and shed, and use faux greenery that can handle the weather.
4. Line the Steps With Pumpkins in Threes
Pumpkins on steps look best in odd numbers, and threes are the easiest group to get right. Put three pumpkins on one side of the bottom step, two on the next landing, and one large pumpkin by the door, or mirror the groups on both sides if your steps are wide. Mix real pumpkins with faux ones, real ones near the door where guests see them up close, faux ones on the lower steps where rain hits. Carved pumpkins go out only in the last week, because a carved pumpkin softens fast in warm weather.
5. Add a Silhouette to the Front Window
Cut a black cat, a witch on a broom, or a simple haunted house from black poster board and tape it to the inside of a front window. When the lamps are on in the evening, the silhouette glows against the glass and neighbors can see it from the sidewalk. This costs almost nothing, it takes ten minutes, and kids love choosing the shape. Keep the silhouette flat against the glass so it reads cleanly from outside, and use painter tape, not packing tape, so it peels off without leaving marks.
6. Keep a Candy Bowl That Looks Styled, Not Dumped
A candy bowl by the door is practical decor, and it deserves a tray. Put a dark bowl or a small cauldron on a wooden tray with a tiny pumpkin and a folded black napkin underneath, and place it where guests can reach it without blocking the doorway. Fill it with wrapped candy in orange, black, and purple wrappers so the bowl itself adds color. If you have a dog, keep the bowl up high, chocolate is dangerous for dogs, and a bowl at dog height is an accident waiting for a distracted minute.

Halloween Home Decor for the Living Room, Where Everyone Gathers
7. Swap Throw Pillows in One Palette Only
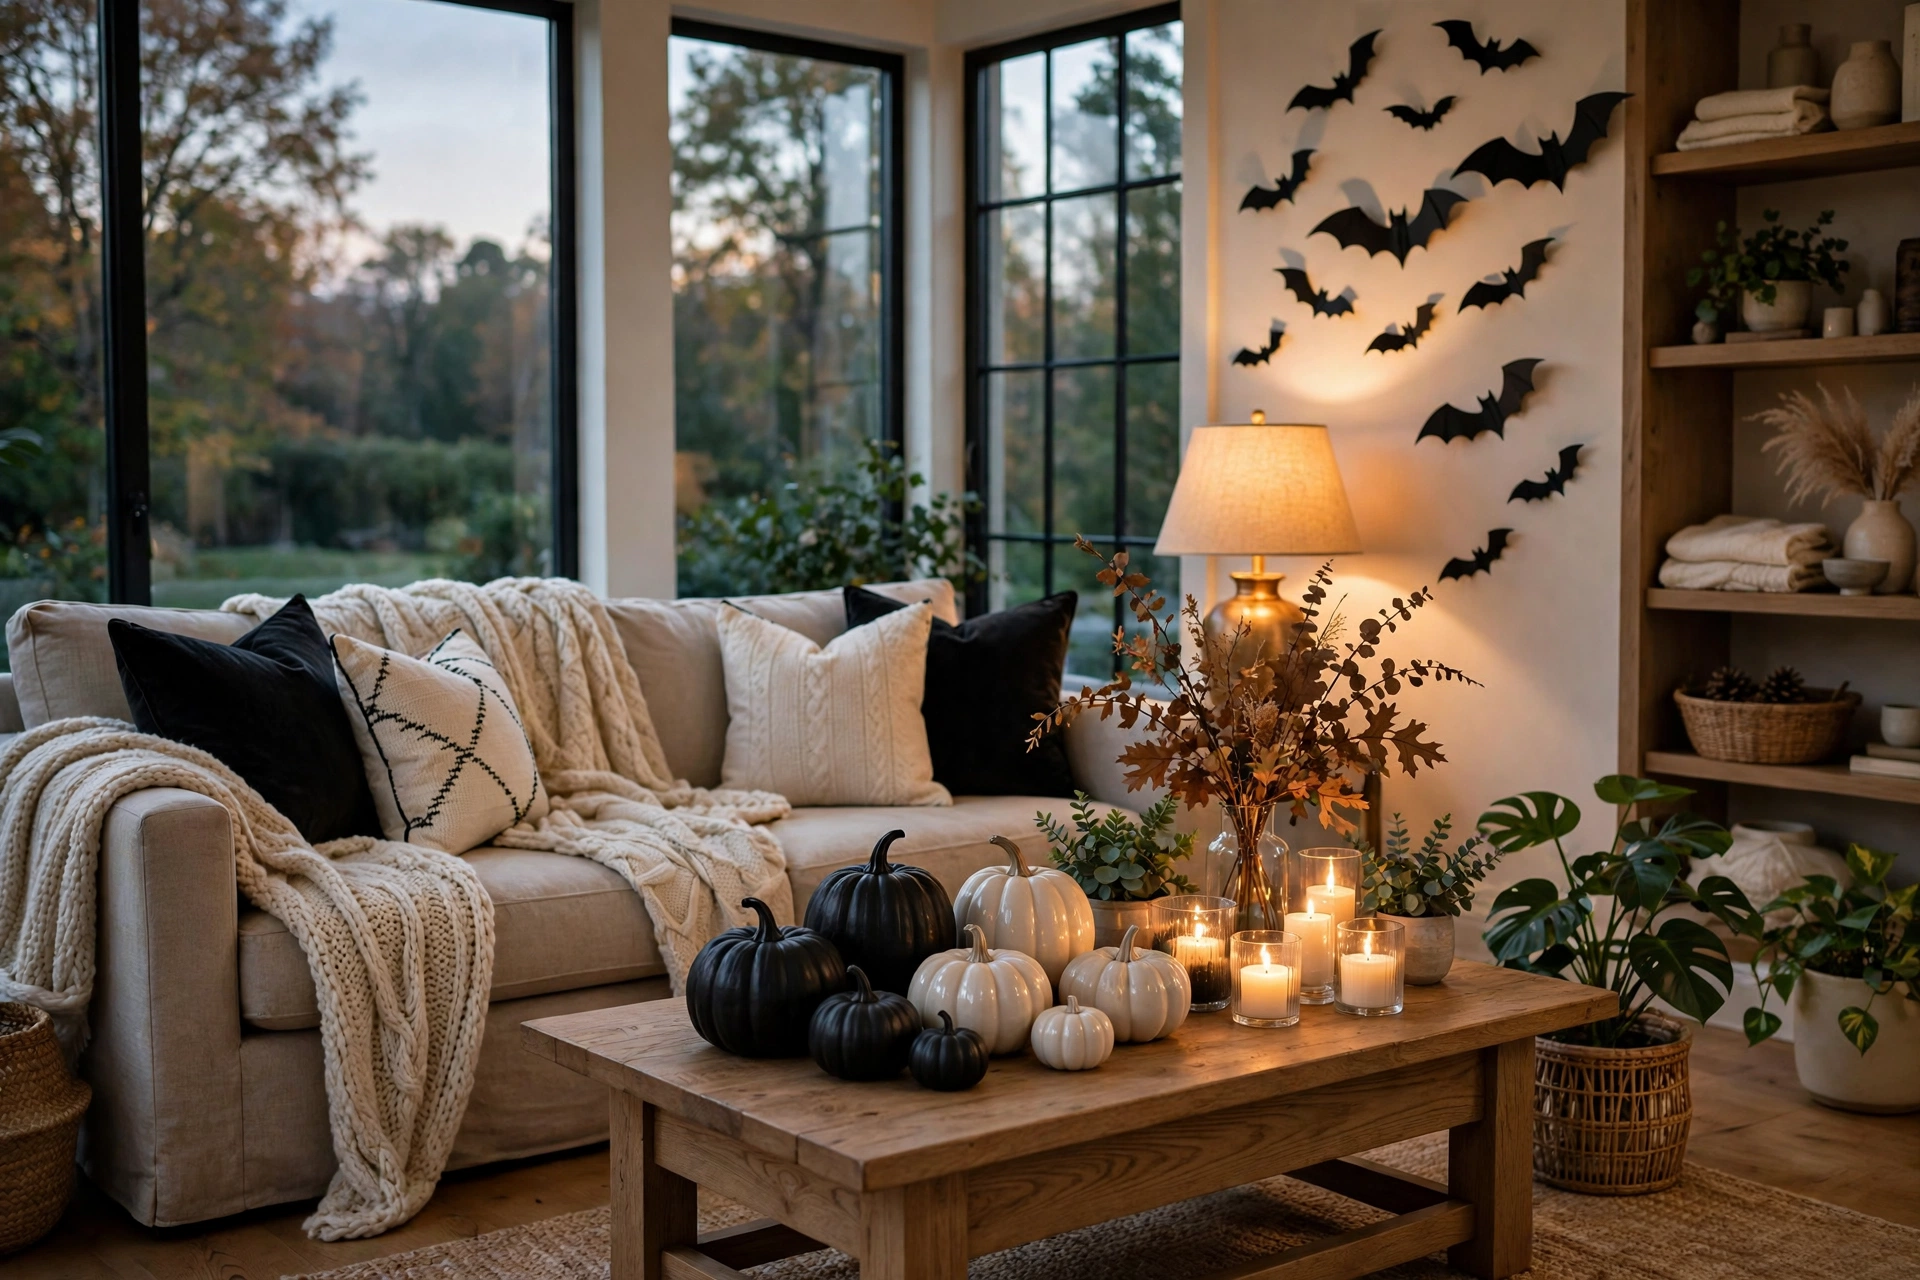
Throw pillows are the fastest seasonal swap in any living room, and the rule is one palette, repeated. Pick black, cream, and burnt orange, and swap two or three pillow covers on the sofa, plus one on an accent chair. Keep your everyday neutral pillows behind them so the look stays layered instead of costume like. These halloween living room decor ideas use the same palette on the sofa, the coffee table, and the mantel, which is why the room feels pulled together instead of decorated in pieces. Store the swapped covers in one labeled bin so next October takes five minutes, not a full afternoon of hunting.
8. Drape Cheesecloth Ghosts Over the Sofa Back
Cheesecloth is the cheapest way to make a living room feel haunted, and it photographs beautifully in warm light. Cut a few yards into wide strips, fray the edges with your fingers, and drape them loosely over the back of the sofa, the top of a bookshelf, or a floor lamp. The fabric catches the light and looks like cobwebs without the sticky mess of fake spider webbing, which clings to everything and is a pain to remove. Tuck one battery tea light behind a fold so the fabric glows softly at night. Keep cheesecloth away from real candles and from the fireplace, because thin fabric and open flame do not mix, ever.
9. Build a Coffee Table Display on a Tray
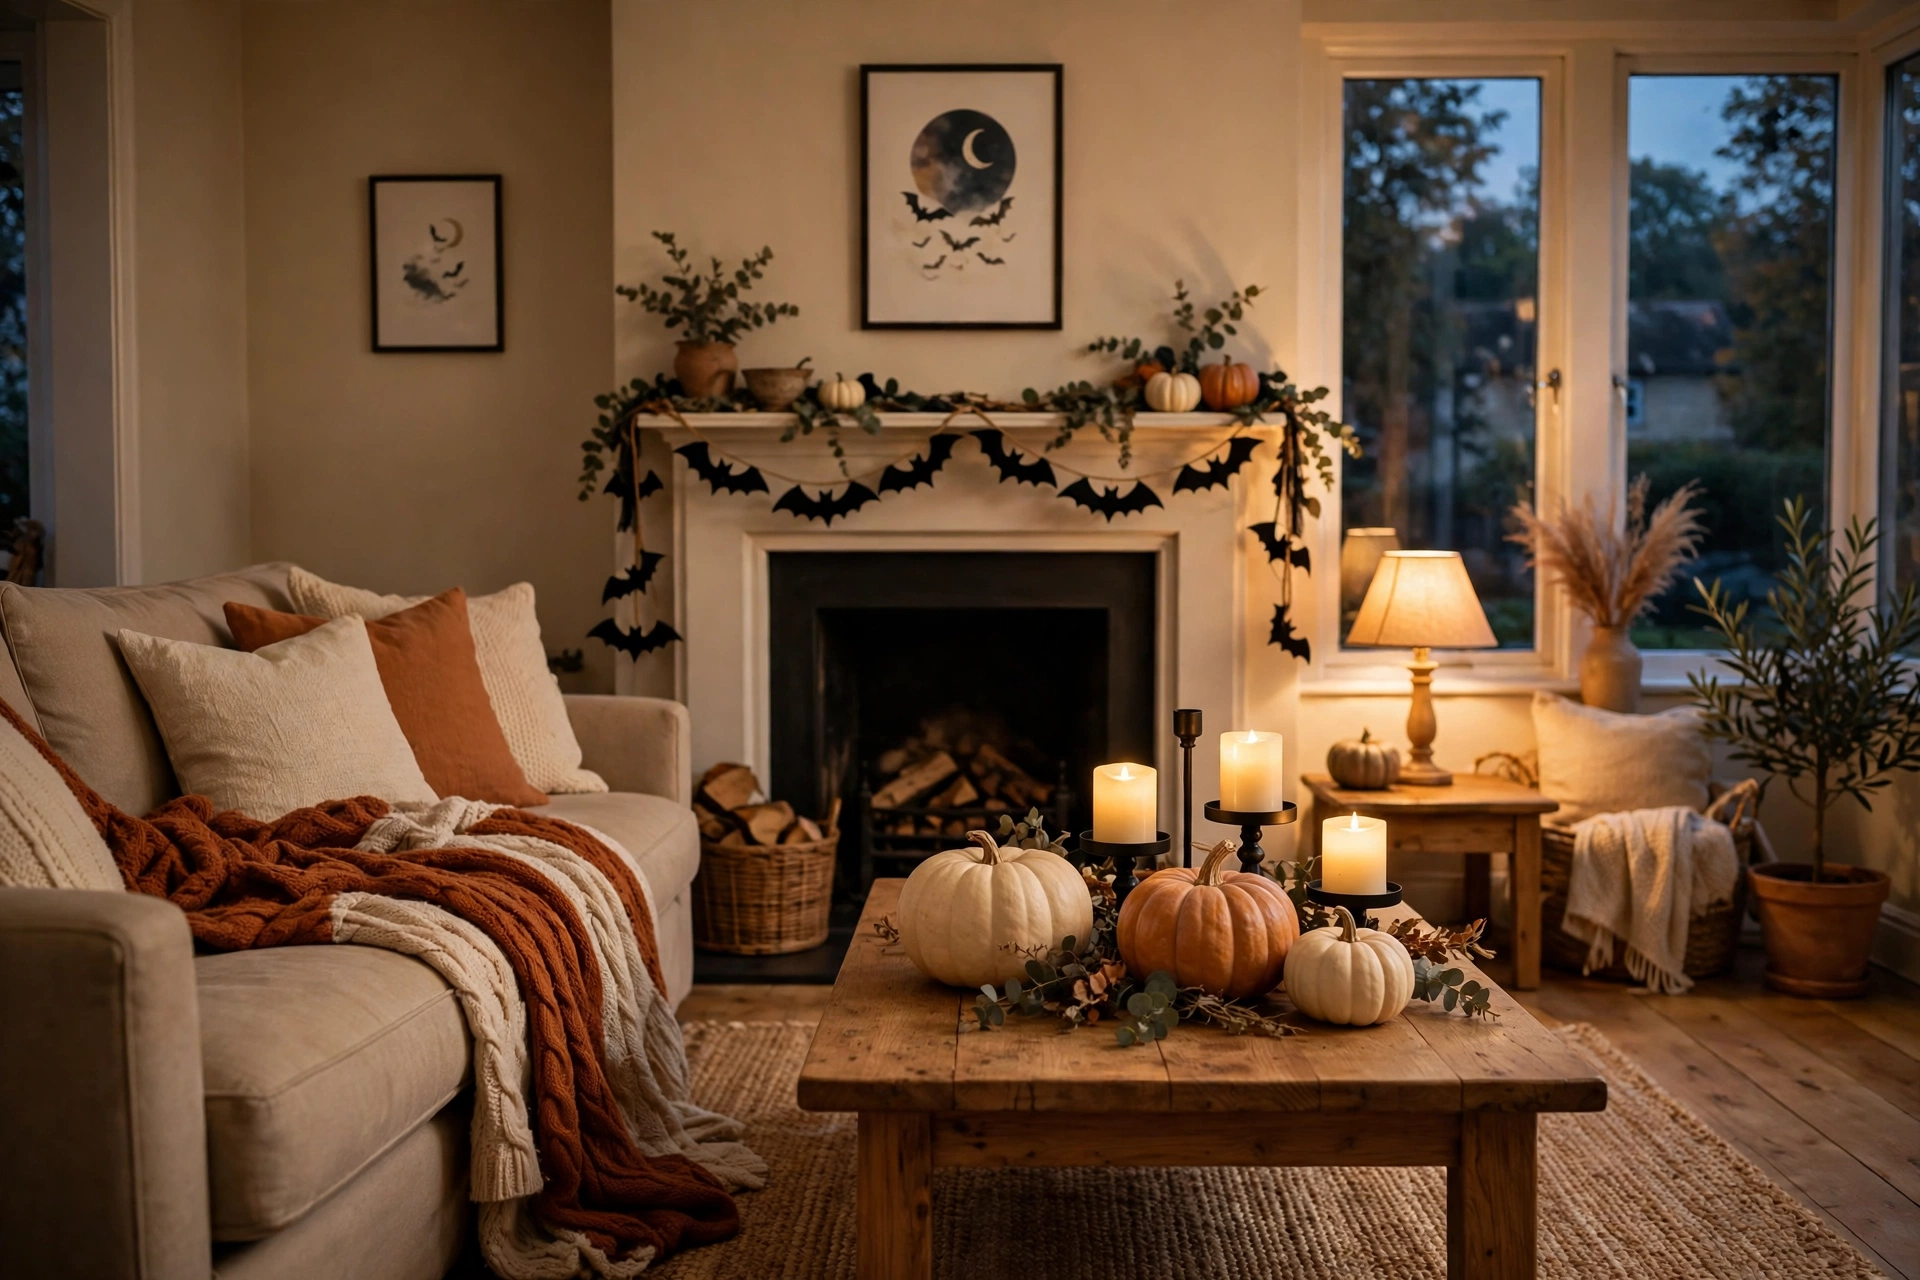
Your coffee table is the center of the gathering spot, so give it one contained moment. Start with a dark tray to anchor everything, then add a small pumpkin, a candle in a glass holder, a stack of two spooky books, and one fun piece like a tiny skull or a ceramic bat. The Tall, Soft, Glow formula works here too: the books are tall, the pumpkin is soft in shape, the candle is the glow. The tray makes cleanup easy when guests come over, just lift the whole display off the table and set it on a side table.
10. Hang Paper Bats in a Rising Swarm
Paper bats are a classic for a reason. They cost almost nothing, they look great in photos, and you can place them anywhere. Cut bats in three sizes from black cardstock, fold the wings slightly for dimension, and stick them to the wall with removable putty in a rising swarm pattern. Start near a corner and let the bats trail upward and outward, like they are flying toward the ceiling. A pack of pre cut bats costs under ten dollars and fills a whole wall, and putty peels off cleanly in November. Keep the swarm on one wall only, the wall guests face when they sit down, so it becomes the backdrop for every photo instead of clutter on every wall.
11. Layer a Chunky Throw for the Cozy Half of Halloween
Cozy is the other half of this look, and a throw is how you get it. Drape a chunky knit throw in burnt orange, deep plum, or black and cream plaid over the arm of the sofa, and fold a second one over the back of an accent chair. Choose a throw you would happily use all fall, not a novelty one with a giant spider on it, so it earns its place beyond Halloween. Pair it with one matching pillow and the seasonal palette feels intentional instead of thrown together. Wash the throw before you put it out, because a throw that has sat in a bin since last year smells like a bin.
12. Use Warm String Lights, Never Bright Multicolor
Warm string lights do more for Halloween mood than almost anything else, and color temperature is the whole trick. Drape a strand of warm white or soft orange fairy lights along a mantel, around a window frame, or across a bookshelf, and keep them on a timer so they come on at dusk without you thinking about it. Skip bright multicolor lights indoors, which read as a party store instead of a home. Use battery lights with a timer in spots with no outlet, and keep the cord tucked behind furniture so nobody trips.
13. Style the Bookshelf With Mini Pumpkins in Odd Numbers
Open shelves are perfect for small Halloween touches, and odd numbers are the rule that keeps them looking styled. Tuck mini pumpkins between books, stand a small skull next to a framed photo, and add one black candle per shelf. Group items in threes, and leave one shelf mostly empty so the decorated shelves stand out. If you have kids, keep the fragile pieces up high and the soft fabric pumpkins down low, where little hands can touch them without breaking anything.
Mantels, Shelves, and Walls
14. Dress the Mantel With a Garland That Ties the Room Together
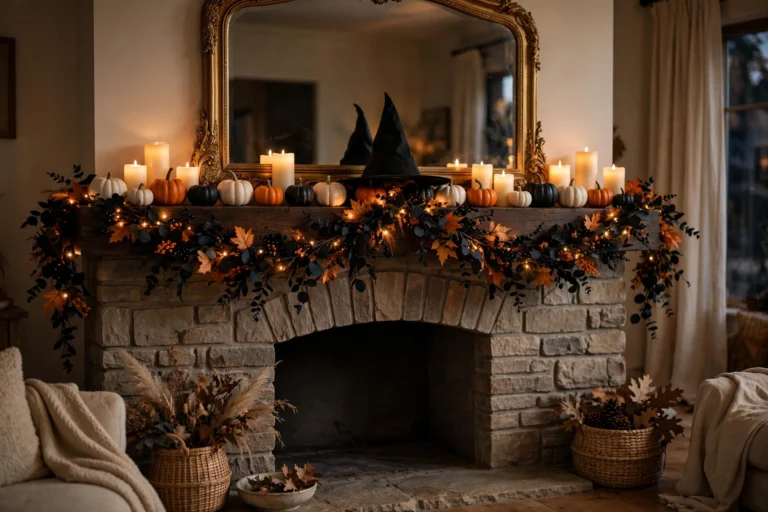
The mantel is the tallest surface in most living rooms, so it carries the room. Drape one garland across it, felt balls in orange, black, and cream, a paper ghost garland, or a simple strand of faux fall leaves, and let the ends hang down a few inches on each side. Then add the Tall, Soft, Glow formula on top: tall candlesticks on one end, a cluster of soft pumpkins in the middle, and candles across the front. If you want a full mantel plan, this halloween mantel decor guide builds the same garland first, then layers the mantel around it. Keep everything at least twelve inches from an open flame, and use flameless candles on the mantel if your fireplace is in use.
15. Fake a Fireplace Glow With a Candle Cluster
No working fireplace is no problem. Cluster pillar candles of different heights on the hearth, on a tray on the floor, or on a console table to fake the glow of a fire. Use flameless LED candles for safety, especially if you have pets or kids, and add a few faux autumn leaves or small pumpkins around the base. Charge or replace the batteries in the first week of October, because a candle cluster with one dead candle in the middle bothers the eye every time you look at it.
16. Swap One or Two Prints for Spooky Art
Take down one or two everyday prints and replace them with Halloween art for the month. Free printable options include vintage witch illustrations, haunted house scenes, and funny ghost quotes. Print them at home, pop them into frames you already own, and hang them in the same spots. Swapping art feels like a bigger change than it is, and it keeps your walls from looking over decorated. IMO, one swapped print in the hallway and one in the living room is the sweet spot. Swap five prints and the house starts to feel like a gallery show. Keep the swapped prints in the back of the same frames, so the switch back in November takes two minutes.
17. Build a Black Frame Gallery With One Moon Print
If you love a gallery wall, Halloween is the month to make it moody. Group three to five black frames on one wall, mix small and medium sizes, and put a moon print, a bat print, or a vintage botanical in the center frame. Keep the other frames filled with art you already own, just in black frames, so the wall feels curated instead of themed. Hang the gallery at eye level, with two inches between frames, and step back before you tighten anything.
18. Put Bats on the Mirror, Not Just the Wall
A mirror with a few paper bats along one edge catches light in a way a wall never does. Stick three to five small bats on the corner of a hallway mirror or a living room mirror, rising up one side, and let the reflection double the swarm. Keep the center of the mirror clear so it still works as a mirror, because a mirror covered in bats is funny for a day and annoying for a month. Use removable putty, never tape, on a mirror, because tape leaves residue that shows in every reflection. Wipe the mirror before guests arrive, because Halloween decor on a streaky mirror just draws attention to the streaks.
19. Run a Garland Down the Staircase Banister
The staircase is the vertical surface most people forget, and it is the first thing guests see from the entryway. Wrap a faux leaf garland loosely around the banister, add small black bats clipped to the leaves, and tuck one battery string light through the garland so it glows at night. Keep the garland on the outside of the banister, not on the handrail itself, so hands still grip wood, not leaves. This matters for safety, especially for older guests and kids running up and down. Tie the garland at the top, the middle, and the bottom with twine, so it does not slide down into a pile by the second week.
Tables, Kitchens, and Party Corners, the DIY Heart
20. Cut a Whole Swarm of Paper Bats in One Sitting
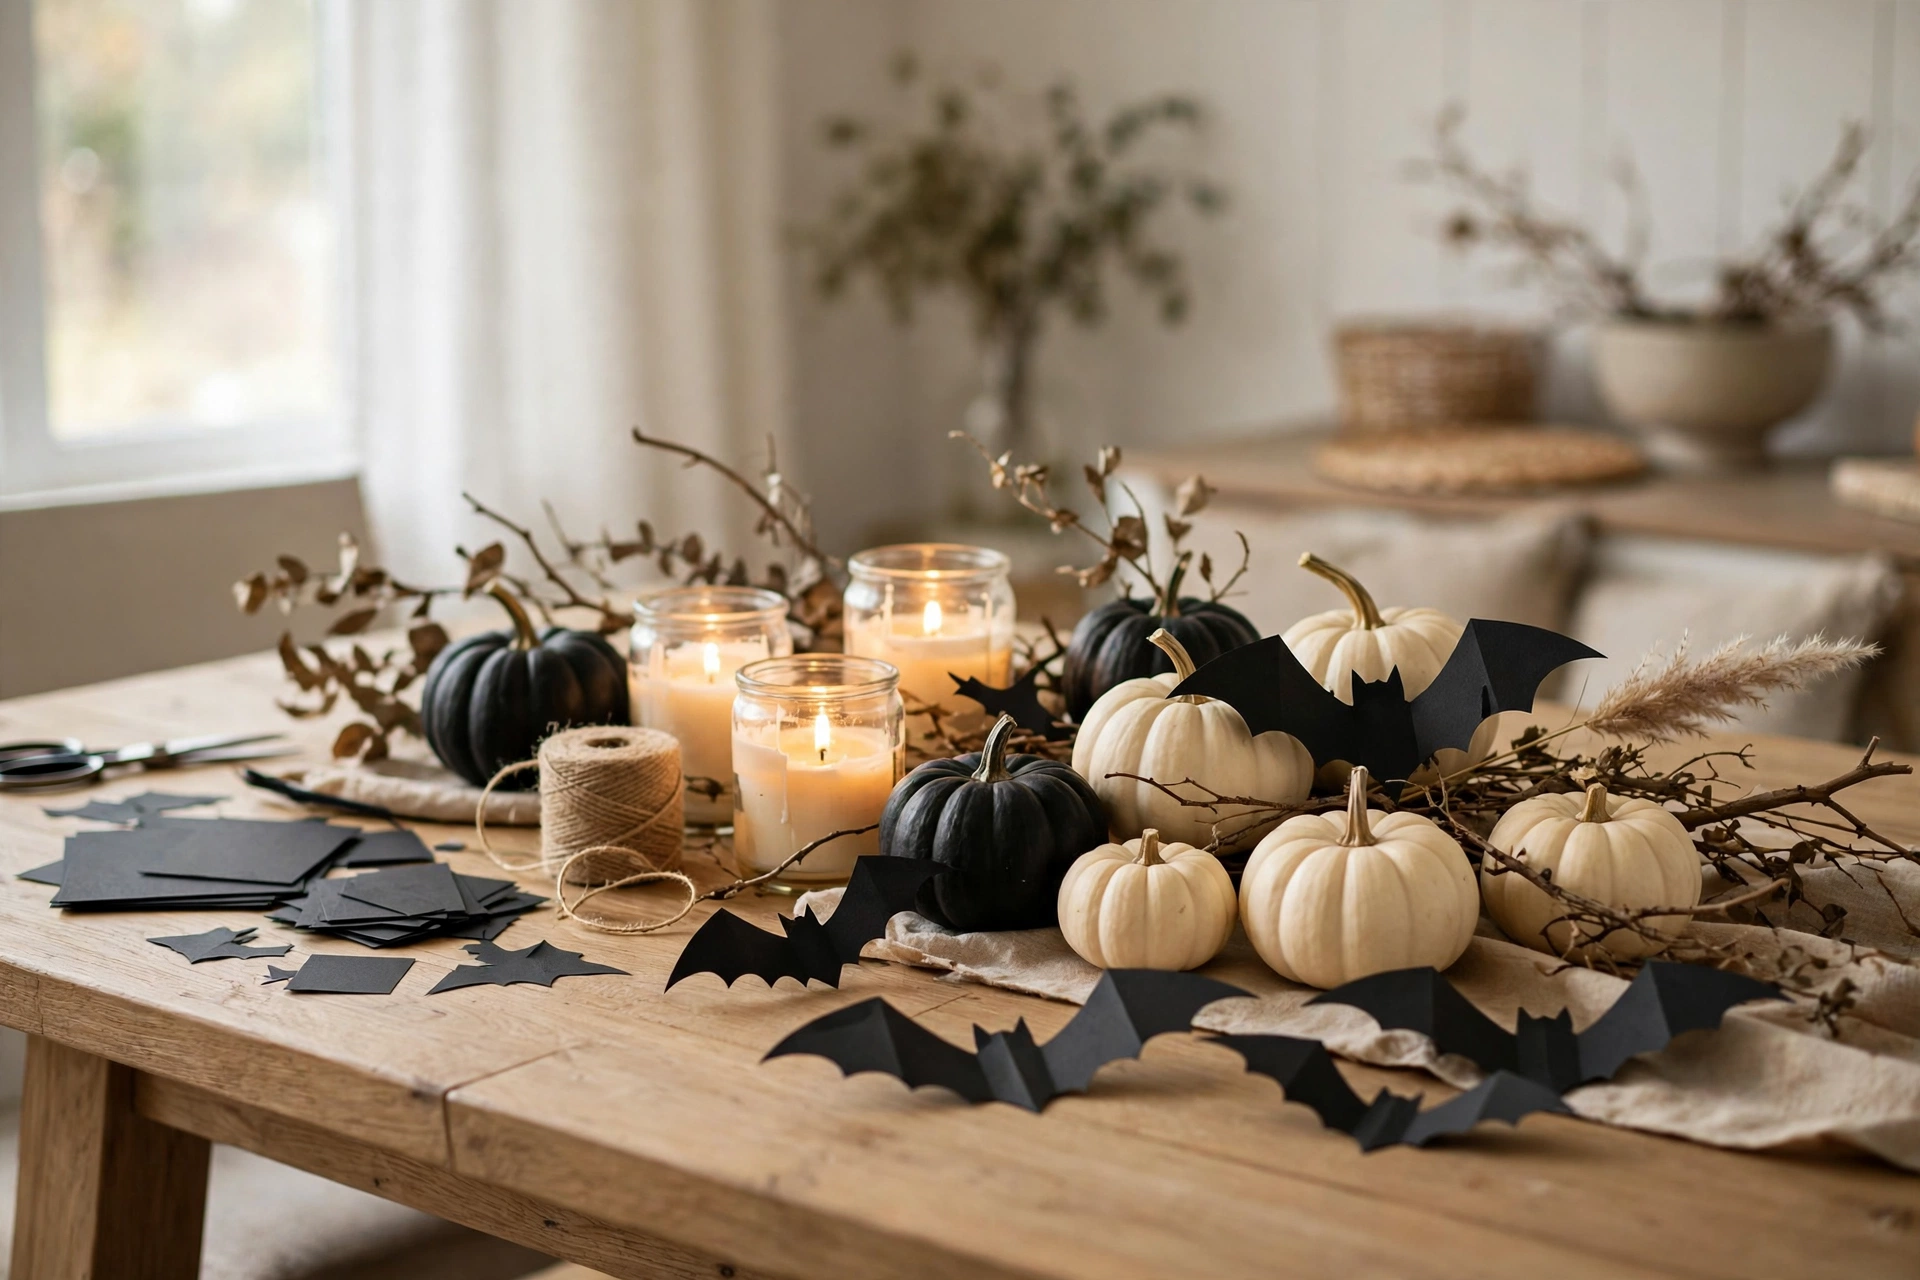
This is the DIY project that fills a whole house for under five dollars. Fold black cardstock, cut bats in three sizes using one simple template, fold the wings, and you have a swarm. Do the whole batch in one sitting at the kitchen table, with a podcast on, and store the extras in a zip bag for next year. These easy DIY Halloween decorations on a budget use the same bats on walls, mirrors, and mantels, which is why one afternoon of cutting covers every zone in this post. Keep the scissors and the small cut pieces away from toddlers, and sweep up the scraps the same day.
21. Paint Pumpkins With Chalk Paint for an Elegant Finish
Painted pumpkins are the elegant answer to carving, and chalk paint is the finish that makes them look expensive. Paint faux pumpkins in matte black, cream, or soft sage, let them dry fully, and add one thin gold stripe or a simple black stem if you like detail. Chalk paint needs no primer on faux pumpkins, and two thin coats beat one thick coat every time, because thick paint drips and shows brush marks. Let each coat dry for an hour, and do the painting outside or on a drop cloth.
22. Build a Table Centerpiece From Jars You Already Own
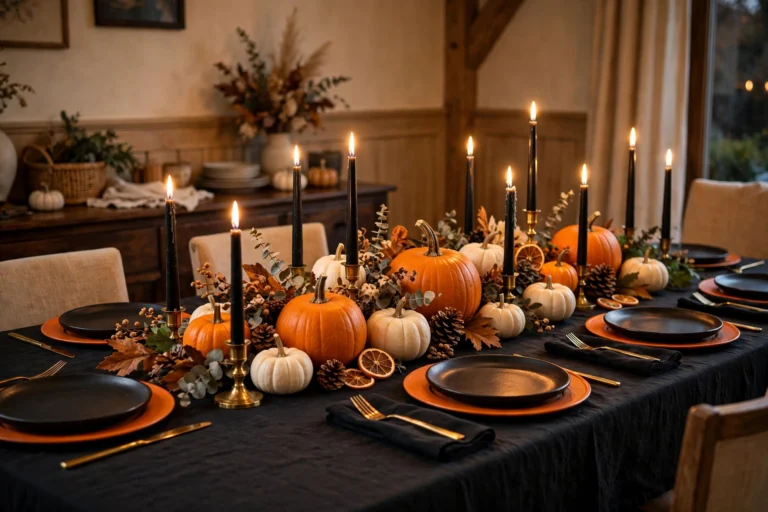
A party table centerpiece does not need a shopping trip. Gather three glass jars, fill them with water and a few dried branches, or use them as candle holders with flameless candles inside, and group them down the center of the table with small pumpkins and a linen runner underneath. The Tall, Soft, Glow formula works here too: the branches are tall, the pumpkins are soft in shape, the jar candles are the glow. Keep the centerpiece low enough that guests can see each other across the table.
23. Give the Kitchen Counter One Tray, and Only One Tray
Kitchens collect clutter fast in October, because every grocery trip adds a bag of candy and a new mug. Give the kitchen one tray, and only one tray, for Halloween. On it: one small pumpkin, one candle in a jar, and one tiny plant or one stack of black napkins. Everything else stays in a cabinet. The tray is the boundary. If it does not fit on the tray, it does not live on the counter. This rule keeps the kitchen usable for real cooking, which matters, because Halloween week is also soup week in most houses.
24. Set Up a Small Potion Station for Drinks
A potion station is a drink station with a Halloween name, and guests love it. Clear one corner of a sideboard or a bar cart, add a few glass bottles with simple labels, a bowl of sliced citrus, a stack of glasses, and one small pumpkin. Use labels you print at home or write by hand, names like Witch Brew for punch and Ghost Fizz for sparkling water, and keep the labels simple so guests can read them from a few feet away. Keep the station away from the stove and away from the main cooking path, because a crowd around a drink station in a working kitchen blocks the cook.
25. Tier the Dessert Table With Cake Stands
A dessert table looks generous when it has height, and cake stands are how you get height without buying a tiered stand. Put a cake stand in the middle, a wooden board on a stack of books on one side, and a low plate on the other, and arrange treats from tallest in the back to lowest in the front. Add one small pumpkin and one candle cluster at the end, and keep the treats in the center, because guests reach from the front and the back of the table gets ignored. Label anything with nuts, because a Halloween party with a nut allergy and no labels is a worry nobody needs.
Bedrooms, Bathrooms, and Small Spaces
26. Give the Bedroom a Cozy Seasonal Bedding Swap
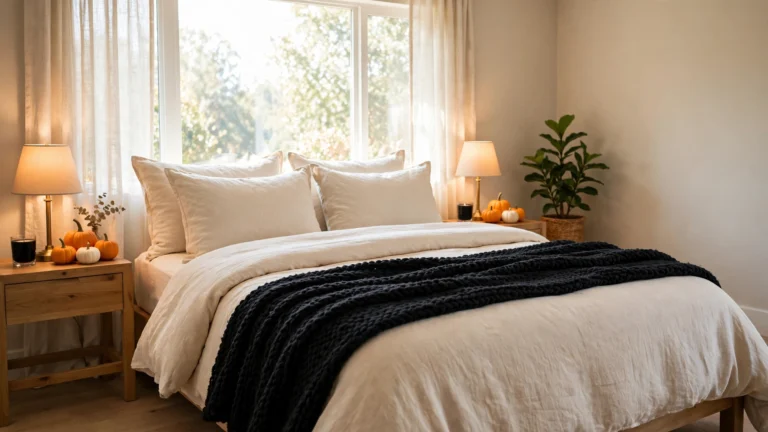
The bedroom gets the cozy version of Halloween, not the scary version, because nobody sleeps well under a staring skeleton. Swap one pillowcase set for rust, plum, or black and cream plaid, add a chunky throw at the foot of the bed, and put two small pumpkins on the nightstand with one flameless candle. That is the whole bedroom. Keep the bedding washable and soft, because seasonal bedding that scratches gets folded up and put away by night two. If you share the bed, agree on the palette together, because one person loving orange and the other hating it is a decorating argument that lasts longer than October. The bedroom should feel like fall when you walk in and like sleep when you lie down.
27. Style the Bathroom With One Tray and One Black Towel
A bathroom needs one tray, one black hand towel, and one small pumpkin, and nothing else. Put the tray on the vanity with a soap bottle, one tiny plant, and the pumpkin, hang the black towel on the ring, and stop. A bathroom covered in Halloween signs, soap dispensers, and shower curtains reads as a holiday display, and you will be tired of it by mid October. One tray reads as a season. Keep the candle flameless in a bathroom, because bathrooms have towels, steam, and small spaces, and an open flame near a towel is a risk that is easy to skip. Swap the towel back in November, and keep the tray for winter, because a tray makes any vanity look intentional.
28. Decorate a Small Room Vertically, Not Horizontally
Small rooms run out of horizontal surface fast, so decorate vertically. Use the wall, the door, and the window, not the floor and the table. Hang the bat swarm up high, put the wreath on the door, add one silhouette to the window, and keep the floor clear. This is the small space version of Door, Glow, Gather: the door carries the theme, one warm light carries the glow, and the one gathering spot, usually the sofa, carries the rest. Measure the wall before you buy anything, because a garland that is too long for a small wall pools on the floor and looks messy. In a small room, editing is decorating. Every piece you leave out makes the pieces you keep look better.
29. Make Every Idea Rental Friendly With Hooks and Putty
Renters can do almost everything on this list with no holes. Use over the door hooks for the wreath, removable putty for bats, suction hooks for a small garland, a freestanding lantern by the door, and a leaning mirror with bats on one corner. Test one putty dot and one hook in a hidden spot first, because putty on fresh paint or textured walls can peel the finish when removed. Take photos on the day you decorate, so you have proof of the before state if a landlord asks. When November comes, everything lifts off in an afternoon, and the apartment looks exactly as you found it, which is the best review a landlord can give. Keep the putty in a labeled bag, because dried out putty in a drawer does not hold a bat on a wall.
30. Build a Kids Corner That Is Cute, Not Scary
Kids need their own corner, and it should be cute, not scary. Give them one low shelf or one corner of the living room with smiling pumpkins, friendly ghost figures, soft fabric bats, and a small basket of Halloween books. Let kids help place the pieces, because a corner they built is a corner they love, and they will leave the grown up displays alone. Keep everything soft and unbreakable at kid height, and keep candles, glass, and small pieces up high. Skip the gore entirely in a shared family room, because a scary display that makes a toddler cry at bedtime is not worth the photo. The kids corner is also the easiest to pack up, one basket, one shelf, done.
Porch Glow and Finishing Touches
31. Line the Porch With Lanterns and LED Candles
Lanterns are the porch version of the candle cluster, and LED candles are the safe version of the flame. Group three lanterns of different heights by the front door, put a flameless candle in each, and add one small pumpkin at the base of the tallest lantern. Turn them on with a timer at dusk, so the porch glows when trick or treaters arrive without you remembering to switch them on. Keep lanterns off walkways and out of the path of the door swing, because a lantern in a walkway is a trip hazard in the dark. If your porch is uncovered, use lanterns rated for outdoor use, because an indoor lantern in October rain rusts by November.
32. Light the Path With Luminaries Guests Can Actually See
A dark path to the front door is the one Halloween decorating mistake that is also a safety problem. Line the walkway with luminaries, paper bags with sand and flameless candles, or low solar path lights with orange covers, spaced about three feet apart. The light should mark the edge of the path, not blind guests, so keep the glow low and warm. Test the path at night before Halloween, walking it yourself in the dark, because a path that looks fine in daylight can hide a step, a hose, or a raised paver at night.
33. Dress Porch Seating With One Throw and One Pillow
If your porch has a rocking chair, a bench, or a swing, dress it with one throw and one pillow, in the same palette as the door. One throw, folded over the arm, and one pillow, propped in the corner, is enough. Porch fabric gets damp, dusty, and visited by spiders, so choose outdoor fabric or a washable throw you can launder in November. Shake the throw out before guests sit down, because a throw that has sat outside for a week collects leaves in its folds. This one dressed seat is the photo spot for the whole porch, and it tells guests to sit and stay, which is the whole point of a porch in October.
34. Finish With a Scent That Smells Like October
Scent is the finishing touch most people forget, and it is the first thing guests notice when they walk in. Simmer a pot of water with orange slices, cinnamon sticks, and cloves on the stove for an hour before guests arrive, or use one candle in pumpkin spice, apple cider, or campfire scent in the living room. Choose one scent and stick with it, so the house smells intentional, not like a candle shop. Never leave a simmer pot or a candle burning unattended.
35. Do the Candlelight Walk Test, Then Stop
My last idea is not a decoration. It is a test, and it is the second framework in this post, the Candlelight Walk Test. At dusk, turn on every Halloween light, every candle, and every string light, then walk slowly from the front door to the sofa, the way a guest does. Ask three questions. Does the door look welcoming from the walkway? Does one warm glow lead your eye from room to room, without a dark gap? Can you sit on the sofa and see the gathering spot, the tray, the throw, and the glow, without clutter blocking the view? If the answer to all three is yes, stop decorating. The biggest Halloween mistake is adding one more sign, one more pumpkin, one more garland, until the house is crowded. Door, Glow, Gather. Tall, Soft, Glow. That is the whole system. One door, one glow, one gathering spot, done well, beats a house full of decorations every single time.
Practical Sections
Safety and Durability: Candles, Flames, Kids, and Pets
Real candles look beautiful and they are the one Halloween risk worth taking seriously. Use flameless LED candles anywhere near fabric, cheesecloth, paper bats, garlands, kids, or pets, which in practice means almost everywhere in this post. Keep real candles in glass holders, on stable trays, away from curtains and from the edge of any surface, and never leave them burning in an empty room. Keep carved pumpkins with real candles outside only, and switch to battery tea lights inside a carved pumpkin, because a dry pumpkin and a real flame is a fire risk that grows drier every day. For pets, skip chocolate displays at dog height, skip small pieces a dog can chew, and keep string lights and cords behind furniture. For kids, keep glass, small skulls, and sharp craft pieces up high, and let kids handle only soft fabric pieces. Durability is simpler: faux pumpkins and garlands last for years if you store them dry, real pumpkins last the month if you keep them dry and out of direct sun, and paper bats last one season if you store them flat in a zip bag.
Budget: Buy Once vs Refresh Each Season
Buy once: a set of faux pumpkins in black, cream, and orange, one good wreath base, one set of tall candlesticks, one dark tray, one chunky throw in a fall palette, one strand of warm string lights with a timer, and a pack of flameless candles in three heights. These are the backbone, and they will serve you for years. Refresh each season: one new pillow cover if you want a change, fresh real pumpkins for the steps, one new candle scent, one small plant or one bunch of dried branches, and paper bats, which are cheap enough to cut fresh every year. My whole refresh costs under 40 dollars most years, because the backbone is already in the bin. For a first year, expect 120 to 200 dollars for the backbone, depending on the throw and the candlesticks, and spend it on the pieces guests touch and see up close, the console, the coffee table, and the porch. Skip the fog machine, skip the blinking skeleton, and skip anything that needs batteries you will forget to buy.
Small Space Variations
In a studio apartment, use the front door and living room sections only, and skip the rest. One wreath, one console or one shelf, one tray on the coffee table, and one bat swarm on one wall is a full Halloween look in a studio. In a small house with no mantel, use the candle cluster on a console or a bookshelf, and let that be the fireplace moment. In a house with no entryway, style the wall beside the front door, because the first wall guests see is the entryway, even without a console. In a shared house where housemates do not all love Halloween, keep the decor to your own room and the front door, and keep shared spaces to one tray and one garland, because shared spaces need agreement. The Door, Glow, Gather system still works in every size: one door moment, one glow moment, one gathering moment, just scaled to the rooms you actually have.
Troubleshooting Fixes
- Paper bats keep falling off the wall? The wall was dusty or the putty was old. Wipe the wall with a dry cloth, use fresh putty, press firmly for ten seconds, and use two dots for large bats. Putty that has sat in a drawer since last year does not hold.
- Cheesecloth looks messy instead of ghostly? You used too much. Take half of it off, fray the edges more, and drape it in one loose fold, not five tight folds. Cheesecloth works when it is airy. A tight wad of cheesecloth just looks like laundry.
- Painted pumpkins showing brush marks? The coat was too thick. Sand lightly with fine sandpaper, wipe off the dust, and add one thin coat. Two thin coats always beat one thick coat, and chalk paint dries fast enough that the second coat can go on within the hour.
- String lights looking harsh or too bright? Switch to warm white, put them on a dimmer or a timer with a shorter on time, and tuck half the strand behind the garland so only part of the light shows. Light that is half hidden reads as glow. Light that is fully exposed reads as a bulb.
- Porch pumpkins softening early? They sat in sun or in a puddle. Move them to shade, lift them off wet ground onto a mat or a tray, and check for soft spots daily. A soft pumpkin goes in the trash, not back on the steps, because it attracts fruit flies fast.
- House smelling like a candle shop? You used too many scents. Blow out all but one candle, open a window for ten minutes, and stick to one scent for the rest of the month. One scent reads as October. Three scents read as a store.
FAQs
How do I decorate my whole house for Halloween without it looking cluttered?
Follow the Door, Glow, Gather path and decorate only three moments: the front door, one warm glow, and the gathering spot where people sit. Use one palette, black, cream, and one warm orange, across every zone, group items in odd numbers on trays, and leave one third of every surface empty. If a room has no tray, no garland, and no swarm, it is not undecorated, it is breathing room, and breathing room is what makes the decorated spots stand out.
What are cheap halloween home decor ideas that still look stylish?
Paper bats, cheesecloth ghosts, and a candy bowl on a tray cost under ten dollars combined and fill a whole wall and a whole entryway. Paint faux pumpkins you already own with chalk paint, swap pillow covers instead of buying new pillows, print Halloween art at home, and use jars you already own as candle holders. The stylish part is not the price, it is the palette and the editing: one palette, one tray per surface, and nothing that blocks real life.
How can I make Halloween decor safe with kids and pets?
Use flameless LED candles everywhere near fabric, paper, kids, or pets, keep real candles in glass holders on stable trays and never leave them burning unattended, and keep chocolate and small pieces up high and out of reach. Put soft fabric pieces at kid height and fragile pieces up high, keep cords behind furniture, and keep carved pumpkins with real candles outside only. Let kids help with the cute corner, and check the floor nightly for small pieces, because a safe house is checked daily, not decorated once.
When should I put up Halloween home decor?
Early to mid October is ideal, because it gives you the full month to enjoy it and lines up with when guests expect to see seasonal decor. Put the backbone up first, the wreath, the console, the tray, and the lights, in the first week, and add the party pieces, the potion station and the dessert table, in the last week. Put carved pumpkins out only in the last few days, because they soften fast. If you host a party, finish decorating at least three days before, so you can do the Candlelight Walk Test and fix anything that looks off.
How do I store Halloween decor after October 31?
Store decorations by zone in one labeled bin per zone, or in one large bin with labeled zip bags, one for the door, one for the living room, one for the mantel, and one for paper bats stored flat. Pack only the Halloween specific pieces, and keep the fall neutrals, pumpkins in cream and black, plaid throws, and warm lights, out through November, because they carry straight into Thanksgiving. Wipe everything before it goes in the bin, replace dead batteries, and write the bin contents on the outside, so next October starts with opening one bin, not hunting through the garage.